Edit Shapes and Graphics
It is crucial to make attractive contents, and in Visme, it is simple to edit shapes and
graphics for engaging output. This tutorial will take you through every stage so that you can
use these features to the maximum in your content.
Free Visme Tutorials/Download PDF and FlipBooks
Navigate to the Graphics Tab.
● Open the Graphics tab on the left sidebar of your project’s editor window and click on
the ‘Graphics’ tab.
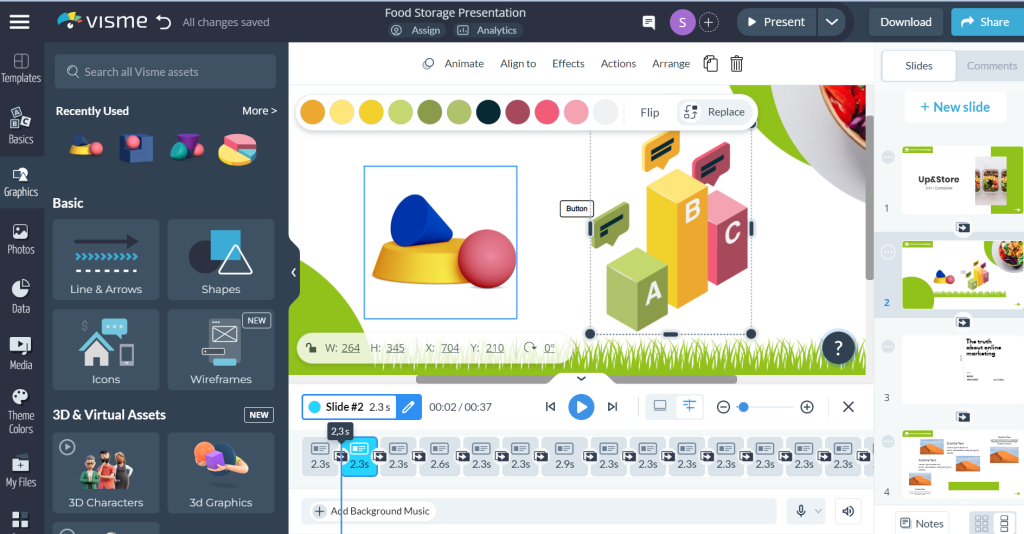
● Within the Graphics tab, click on lines, shapes, icons, and more categories to explore
various options.
● To search for a specific style, enter the keywords in the search bar or choose a shape
or line you prefer from the available categories.
● Place it by clicking on the shape or line of your choice, or drag and drop them directly
on the project.
● For custom line selection, go to the ‘Lines & Arrows’ tab and then click the ‘Custom
Lines’ button. A standard line will be added to your project, and the Settings Panel
will appear for further customization.
Remove shapes or lines.
● Click on the shape or line you wish to remove.
● In the Property Panel at the top, click on the ‘Trash’ button to delete the selected
shape or line.
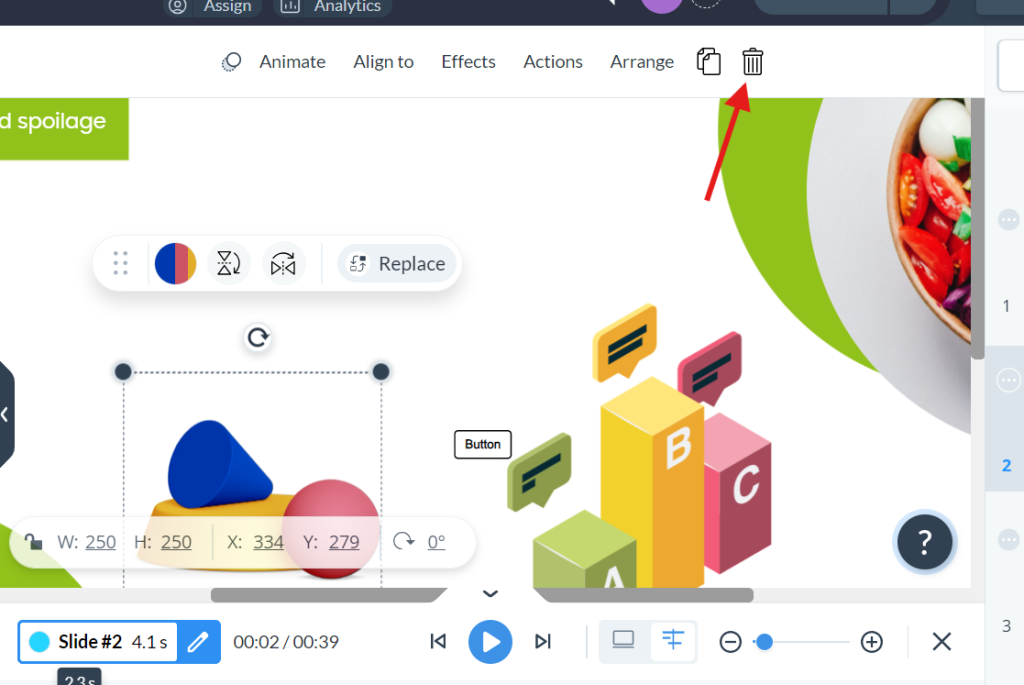
● You can also click on the line or shape and press the ‘Delete’ button on your
keyboard.
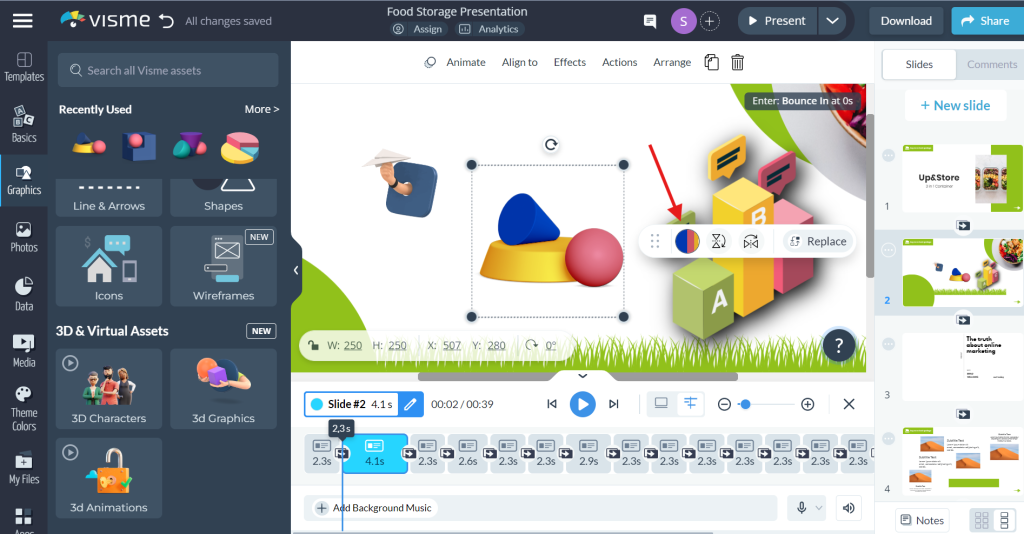
Changing object colors
● Click on the object you want to change the color for. A square box will appear at the
top left.
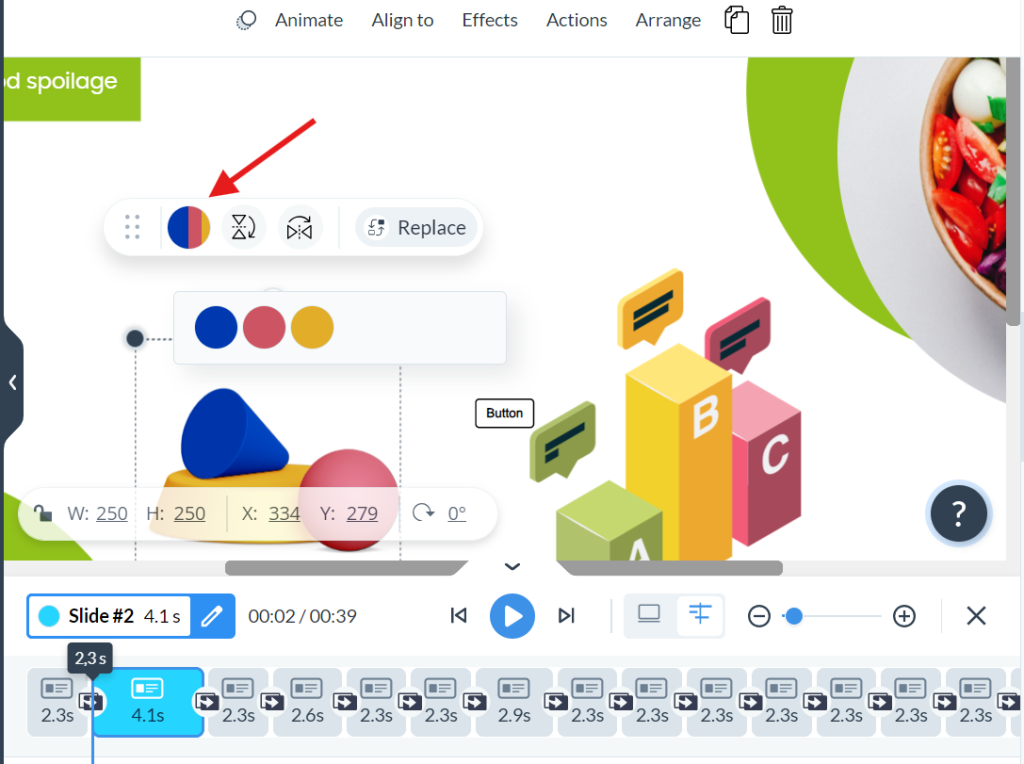
● Click the color box and select a new color from the Color Picker, choose from an
image, or enter a hex code by clicking the ‘Plus’ button. Click OK to apply the color.
● Access the Presets tab to quickly apply predefined color schemes to your selected
object.
Formatting Lines
● Click on the line you want to format. Dotted lines will appear around it, indicating it
is selected.
● Drag the blue dot to adjust the line’s size and position.
● Click on the color box in the Property Panel to select a new color for the line.
Applying Drop Shadow Effects
● Click on the image or shape you want to add a shadow to, and then click the Effects
button at the top right of the screen.
● Turn the Shadow switch ‘ON’ in the drop-down menu that appears. Adjust the
shadow settings as needed.
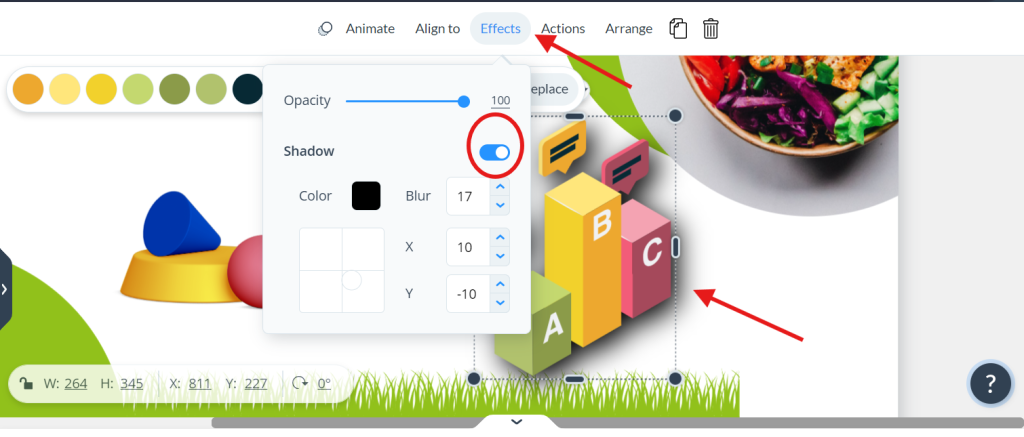
● Click the color box to select a shadow color. You can choose from brand colors,
existing colors, add a new color by hex code, or use the color picker.
● Use the blur box to customize the blur effect. Move the shadow placement circle or
enter precise values to achieve the desired shadow placement.
Snap to Objects
● Click on the hamburger icon in the editor window, select View Settings, and turn the
Snap to Objects switch on.
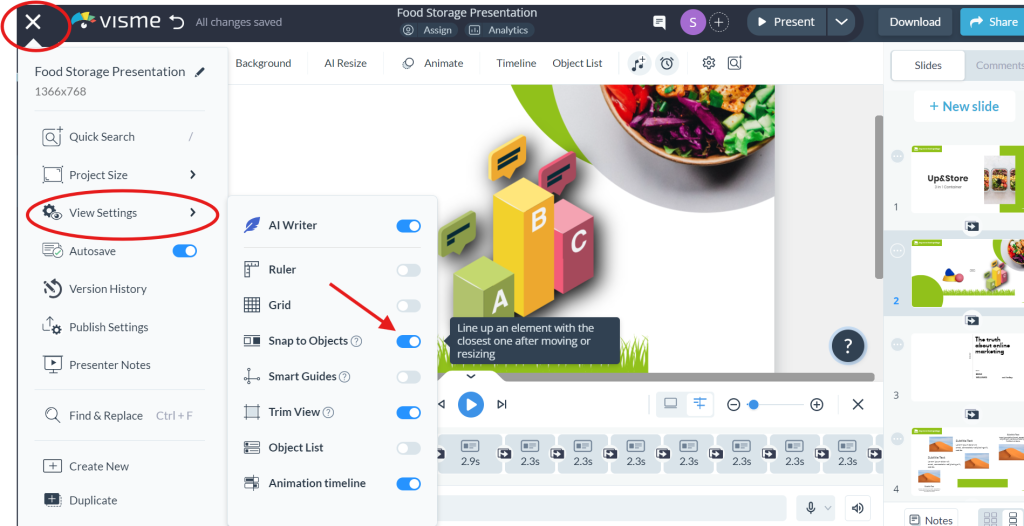
● As you move objects, blue dotted lines will appear to help align them perfectly with
other elements in your design.
● Drag objects to their new location, ensuring perfect alignment for a clean and
professional design.
Adding 3D animated graphics
● From the editor window, select the ‘Graphics’ tab, and then go to the ‘3D
Animations’ section.
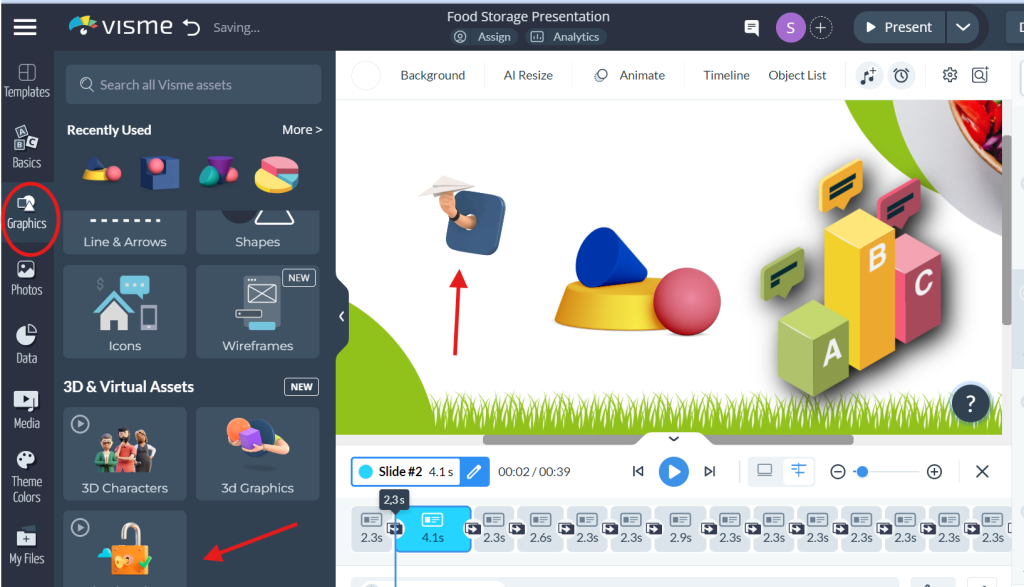
● Choose the desired animated asset and click to insert it into your canvas.
● Use the settings tab to manage asset repetition, flip graphics, and adjust colors.
Using the Color Dropper Tool
● Choose the color you want to change to an object or background, select the ‘Color
tile’ tab at the top left corner, and click ‘Add’.
● With the color dropper tool, place your cursor over the object you want to use as a
reference to choose the color from.
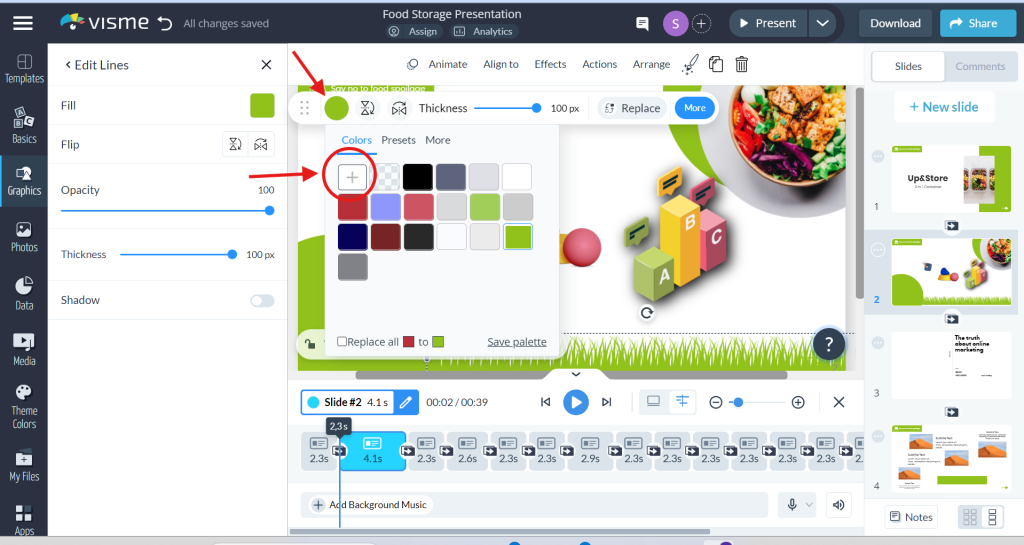
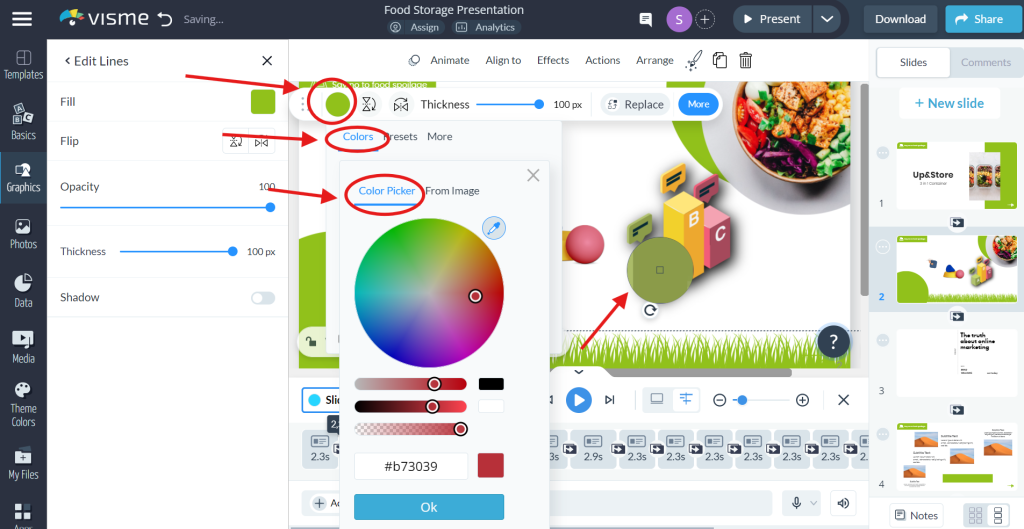
● Organize favorite colors into palettes for their further use.
Drawing on Your Project
● On the editor window, select the ‘Basics’ tab on the sidebar and click the ‘Pencil’ icon
at the top right.
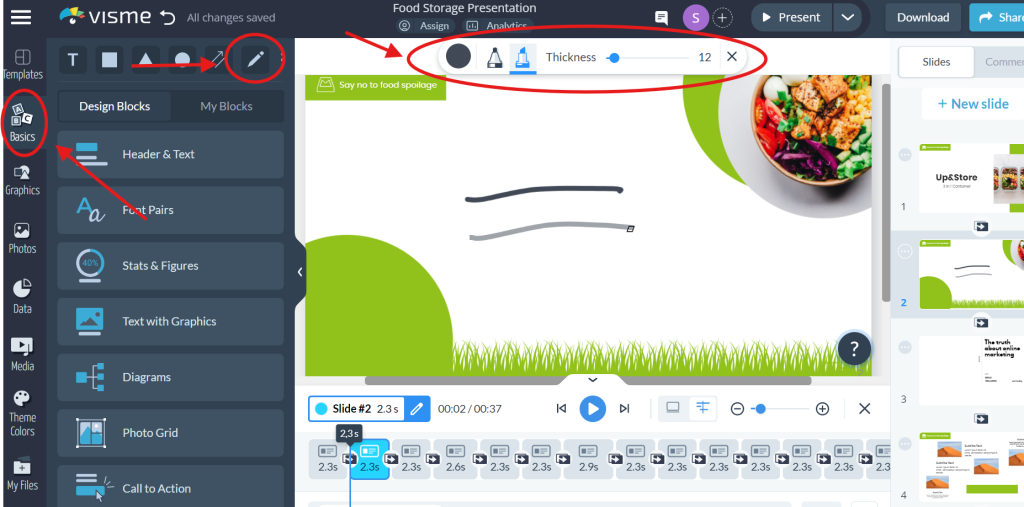
● The drawing tool will appear in the top left corner. Choose the kind of brush, its color,
and its width to begin with so as to draw something. You can draw simple lines,
arrows, circles, free-hand lines, line drawings, signatures, and many more right on
your project.
By doing above methods you can easily edit shapes and graphics in Visme


