Uploading Images from Various Sources
● Click on the ‘My Images’ button to upload images.
● Visme allows you to upload images from multiple sources.

● Upload directly from your PC.
● By URL: Insert an image by pasting its URL.
● Camera: Use your device’s camera to capture and upload an image.
● Google Drive, Dropbox, and more—access and upload images stored in cloud
services.
● You can also drag images from any location into Visme, so paste the image.
Free Visme Tutorials/Download PDF and FlipBooks
Managing Files with the Dropdown Menu
● Within the ‘My Files’ tab, all of the files are bundled in one’s drop-down menu for
easy access.
● Selecting the drop-down button will enable you to manage the created folders,
uploaded files, documents, images, logos, videos, and audio. Insert figure 79.
Editing images in Visme
● Click on the image you wish to resize.
● Adjust the size while maintaining the aspect ratio by dragging the corner handles.
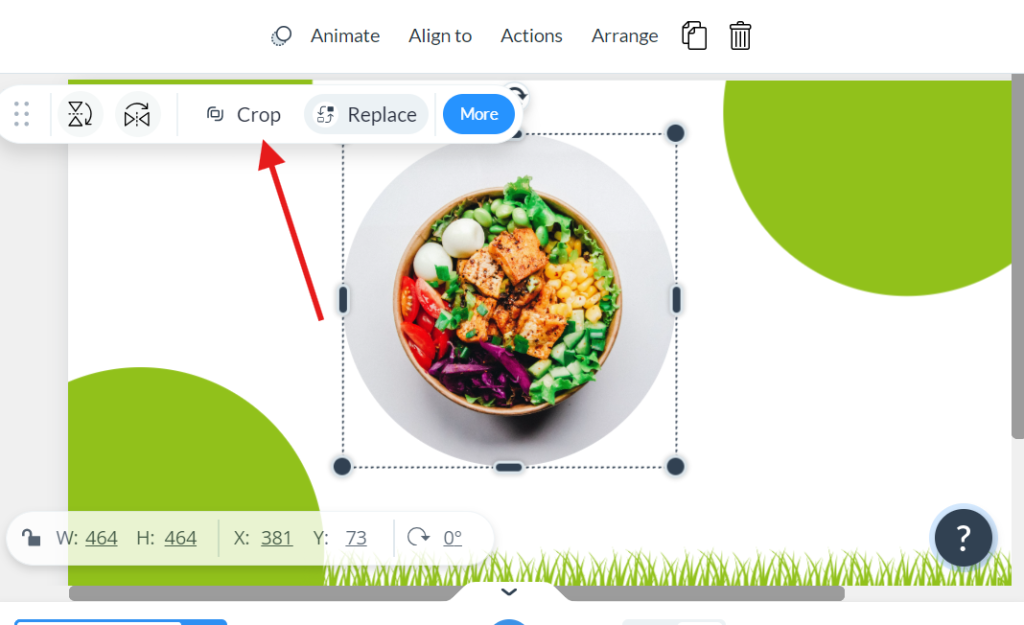
● Stretch or compress the image as needed by dragging the side handles.
● Click the image you want to copy.
* Use the cropping tool to crop the image.
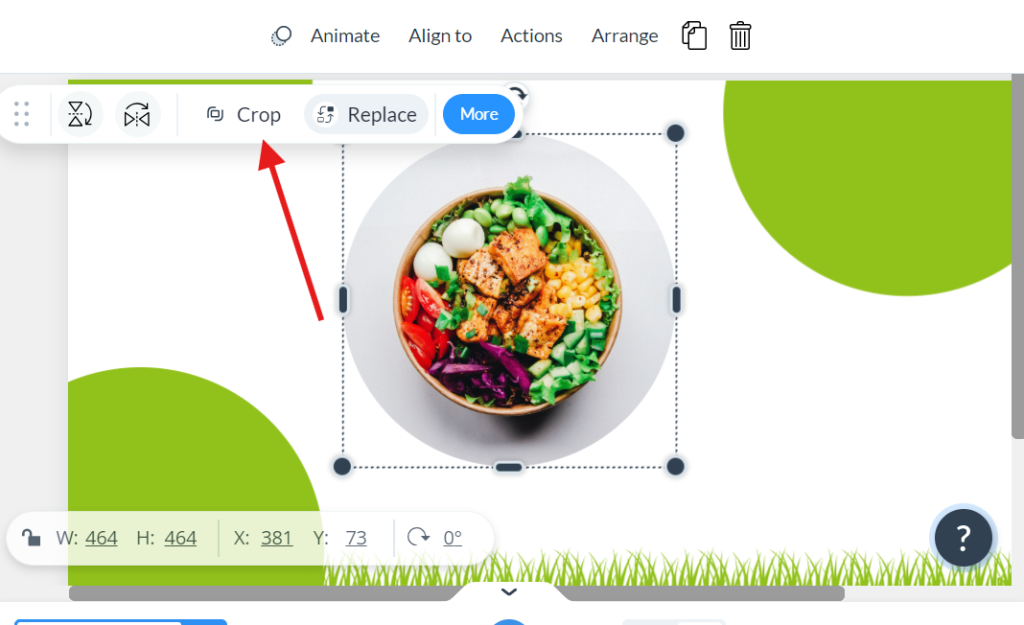
● Once you’re satisfied with the crop, press ‘Enter’ to apply it.
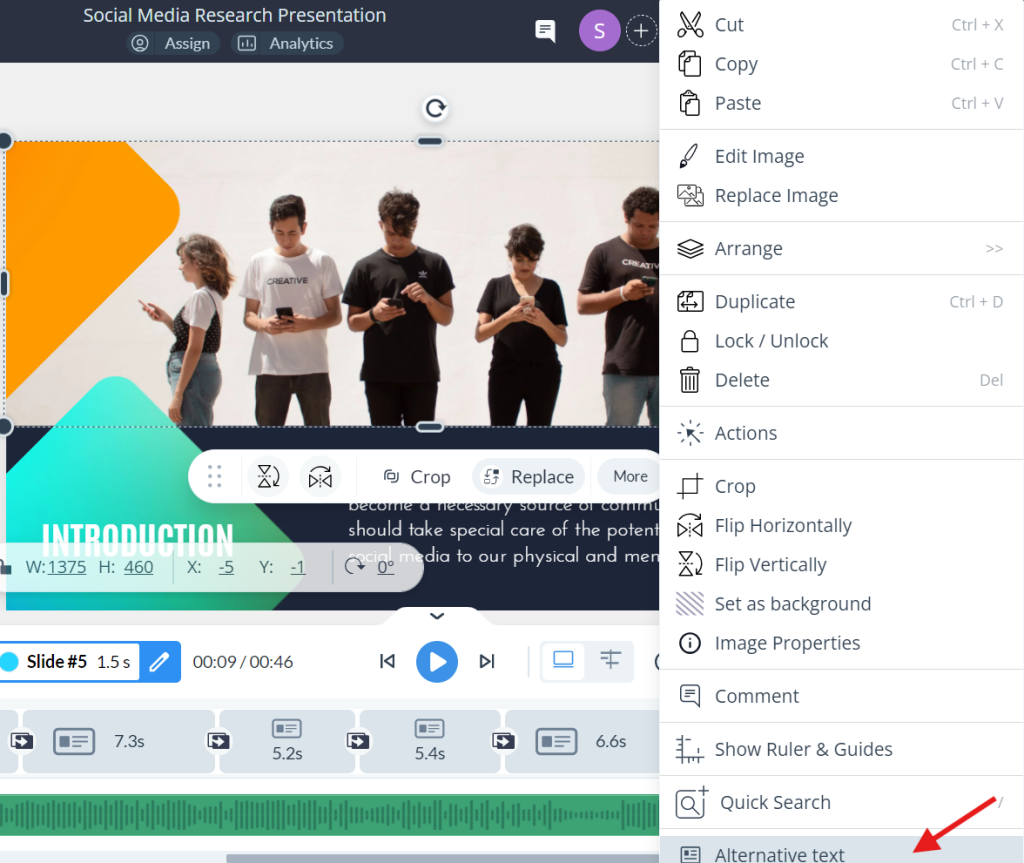
● You can also insert alternative text to the image by right clicking the image and
selecting ‘Alternative text’.
Rotating and positioning images
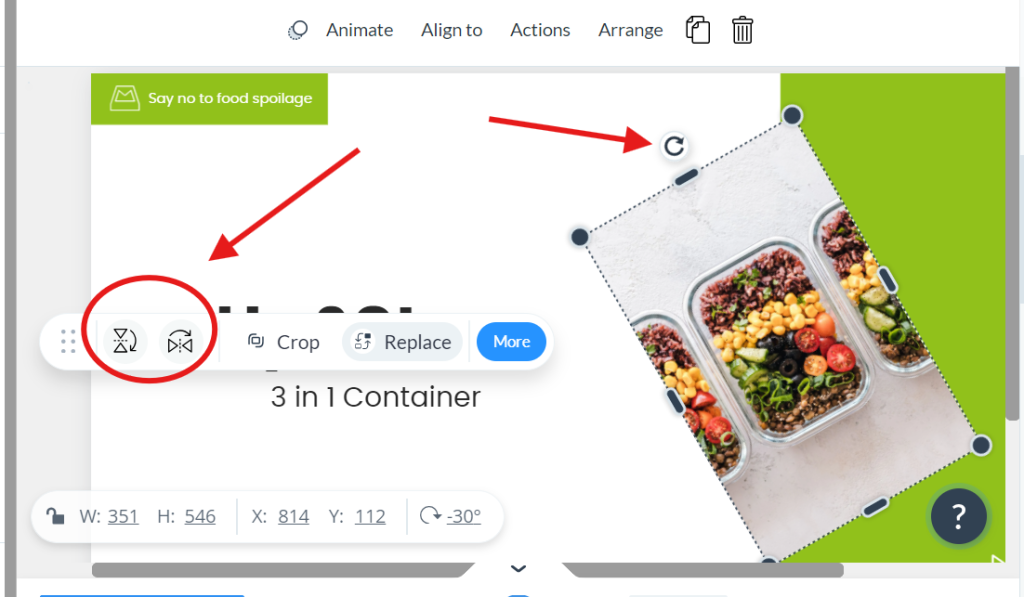
● Choose the image you want to rotate.
* Use the ‘rotate’ option to change the direction of the image.
* Use the preset angles, or you can manually rotate using the ‘rotate’ icon.
● Click on the image to position it within your project.
● Use tools to align the image (e.g., left, center, and right).
● Adjust how text wraps around the images, choosing from options like square, tight, or
behind text.
Adjusting image settings
● Click on the image to activate editing options.
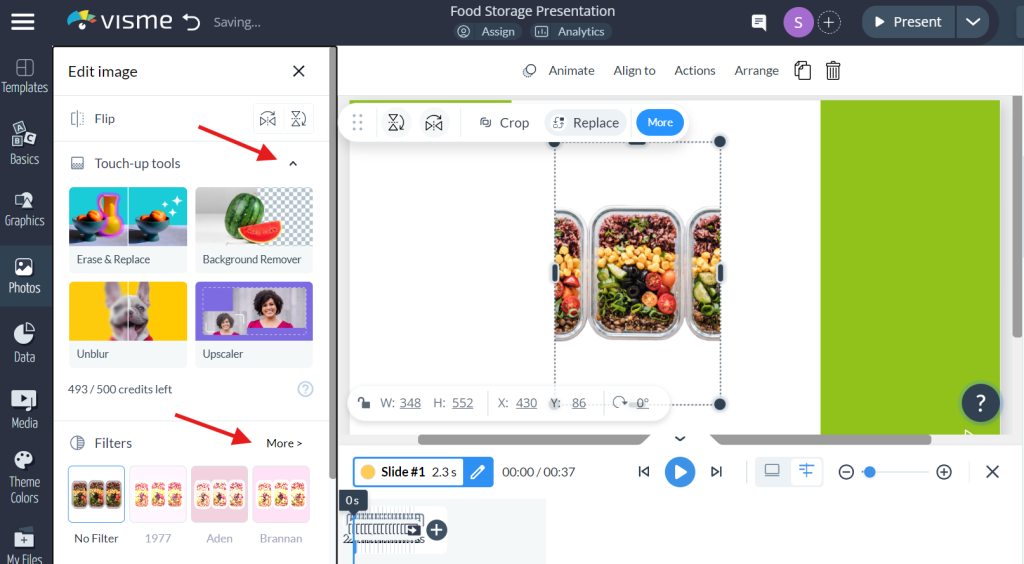
● Adjust the brightness and contrast settings to enhance the image’s appearance.
* Modify the color balance or apply filters for different visual effects.
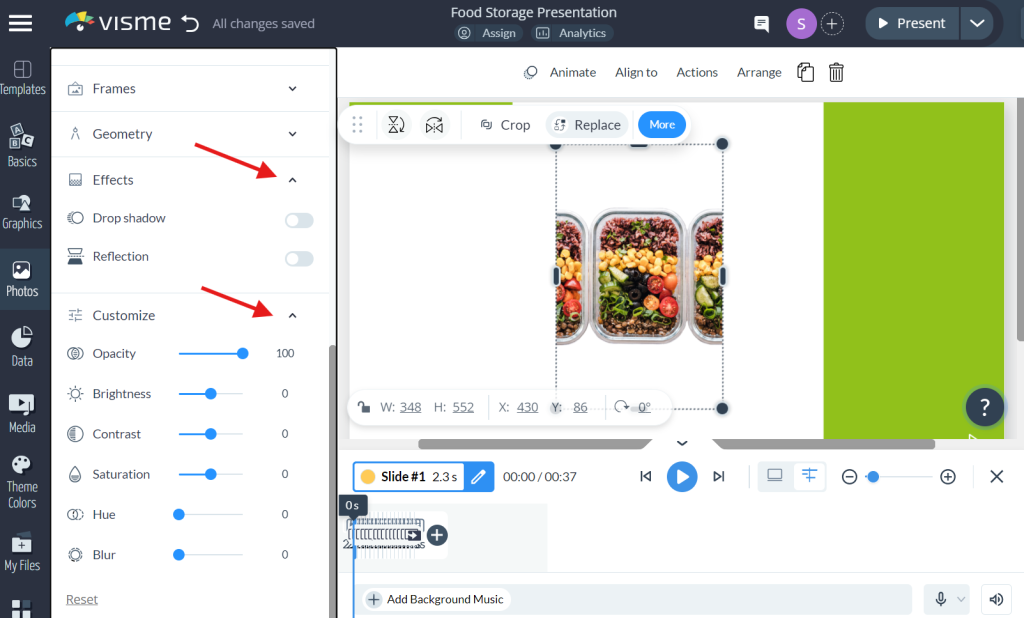
● Adding borders and effects
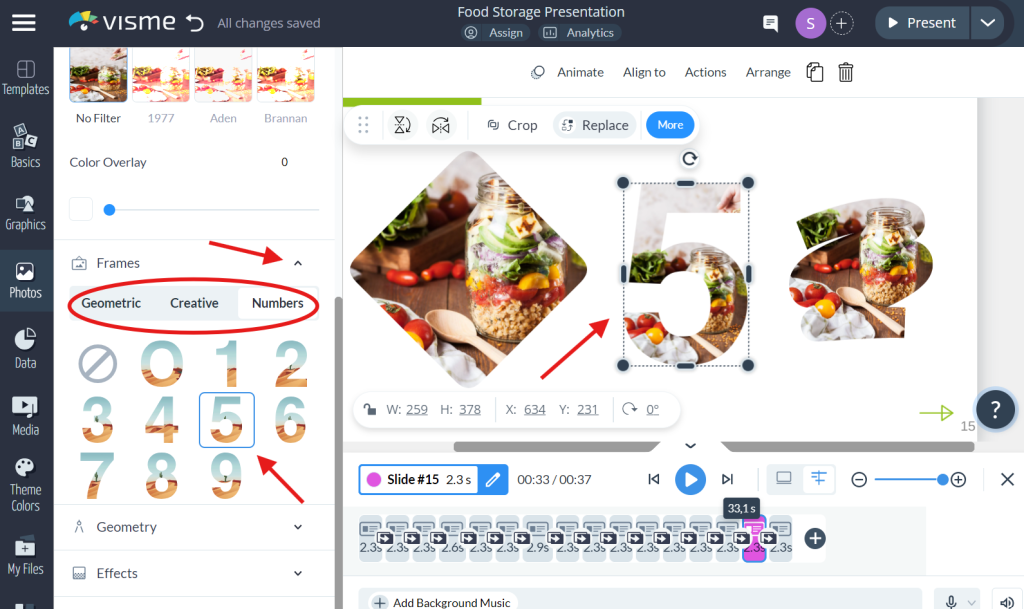
● Highlight the image to see additional editing options.
● Choose ‘Frames’ to set the image with geometric, creative, and numbered frames.
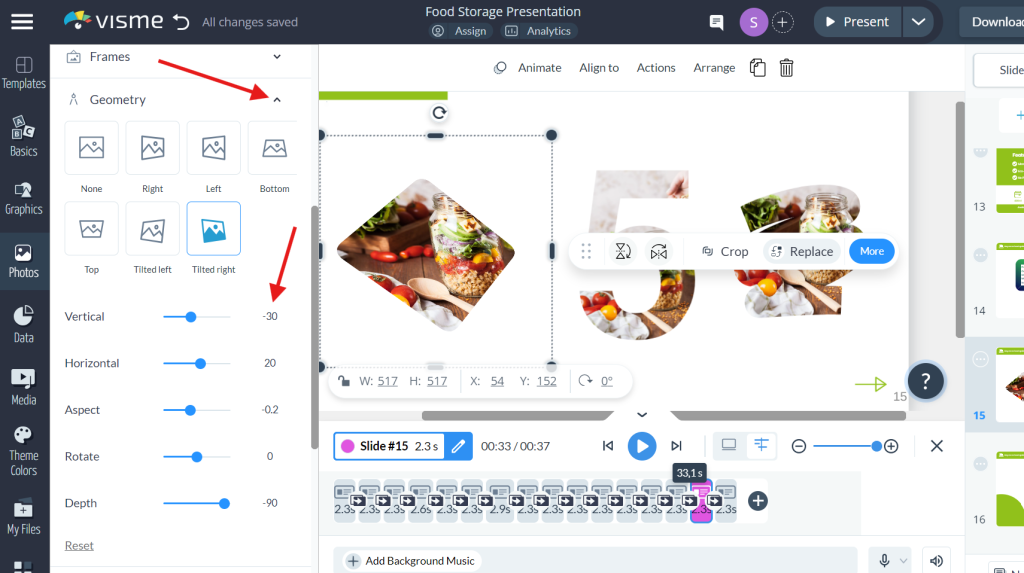
● Choose ‘Geometry’ to tilt the image.
* Using layers, one can place a shadow behind the object, reflect on the object, or apply
a glow around the object.
Grouping and Ungrouping Images
* Hold the ‘Shift’ key and click each image you want to group.
● Combine selected images into a single unit by clicking ‘Group.’.
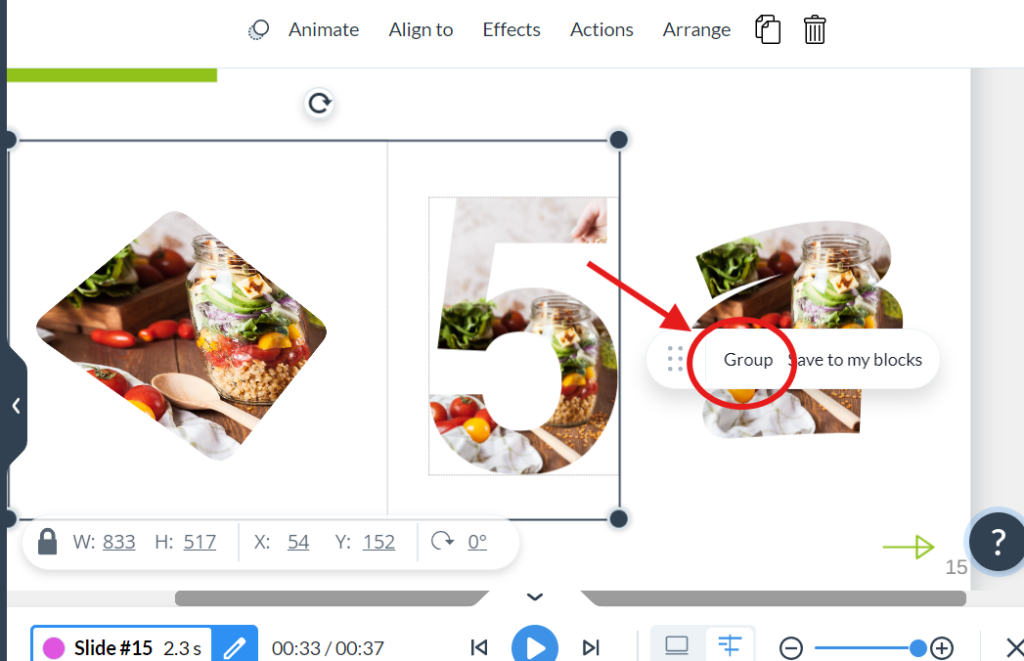
● If needed, you can ungroup images by selecting the images that are in a group and
clicking ‘Ungroup’.
Techniques
● To keep the aspect ratio when scaling, just press the ‘Shift’ key for proportional
scaling of the image.

● Ensure your images are high-resolution to prevent pixelation.
● Compress images if necessary to reduce the file size without losing quality.
● Maintain a consistent style across all images in your project for a professional
appearance.


