Step 1: Access Design and Log In
♦If you don’t have an account, create one and then launch the Designrr tool and sign
into your account.
♦Make sure you are on a premium plan because this option is available only for such a
plan. Free plans provide 5,000 credits every month; in this case, one credit equals one
word, whereas the Premium plan comes with 100,000 per month.
Step 2: Start the Audiobook Creating Process
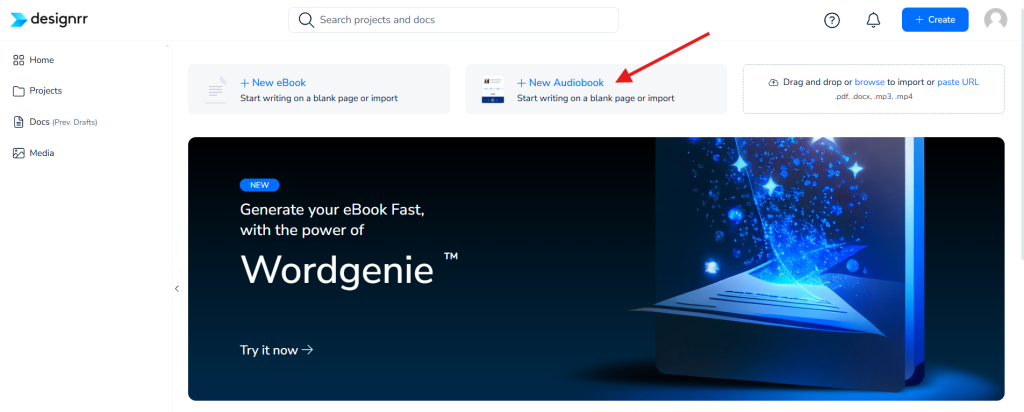
♦At this screen will be an option that says “+ New Audiobook.” Click anywhere inside
the option.
Step 3: Import Your Audiobook Content
Designrr offers several import options for content, so choose the one that fits your needs.
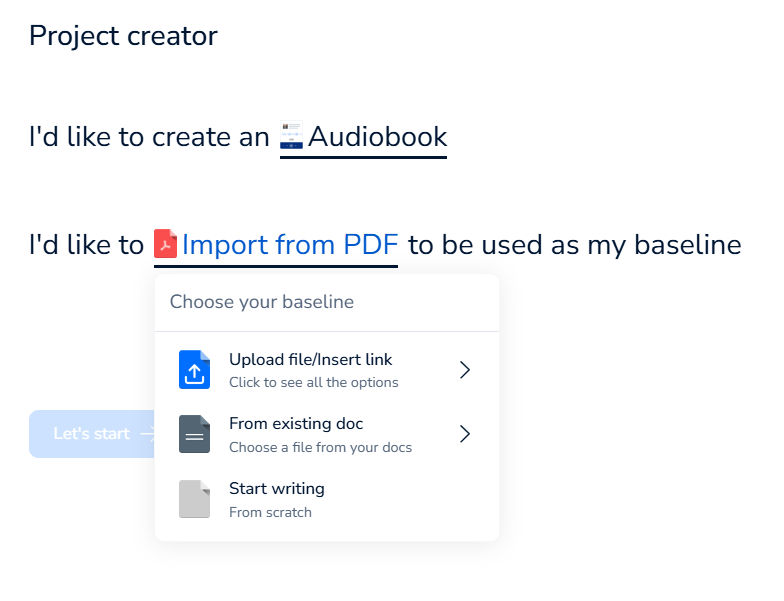
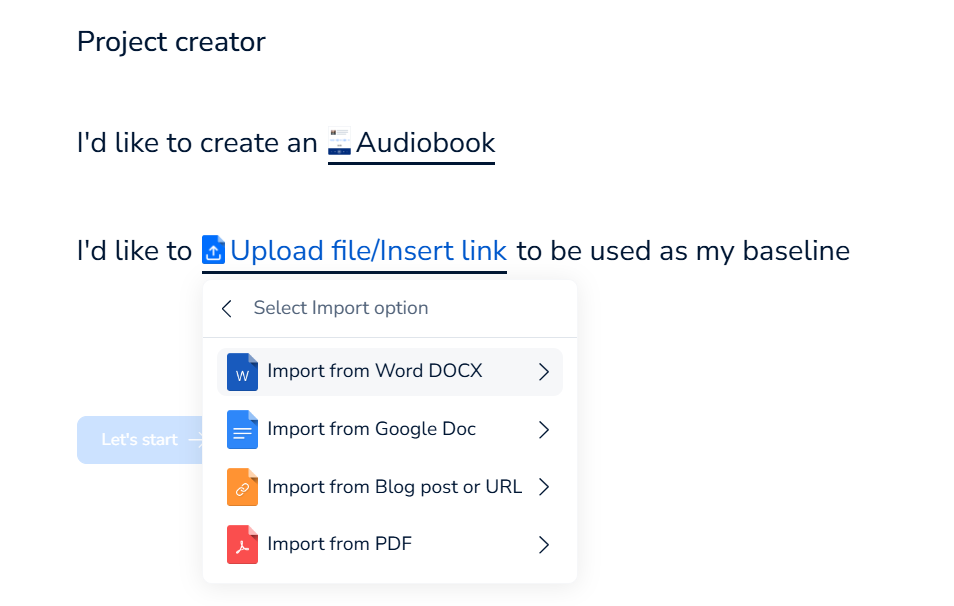
♦PDF: If your ebook is in PDF format, then this option should be selected.
♦Google Doc: My Recoloring work has been produced with the help of Designrr and a
Google Doc to import; if you have one, choose ‘Import from Google Doc’, then paste
the shortened URL of the Google document in the address bar of Designrr.
♦Word Document or other formats: You can also reach content imported from Word
or blog posts.
Step 4: Configure the Narration Settings
To do so, you need to get familiar with the narration settings.
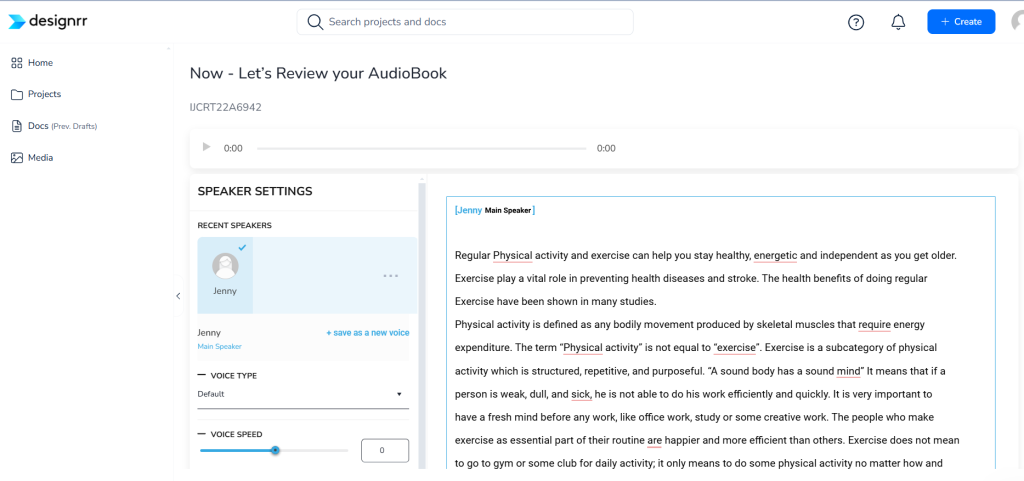
♦Upon importing, the software, in this case, Designrr, will fetch your content to the
audiobook editor.
♦Use the narrator options (Jenny, Guy, Aria) to choose the voice for your audiobook
going forward.
♦It is also possible to make different narrators for different sections of the ebook, which
will make the voices different.
Step 5: Adjust the Voice Settings
♦Tone of Voice: Select from over five different tones, such as empathic, cheerful,
chatty, or newscast casual, based on your audiobook content.
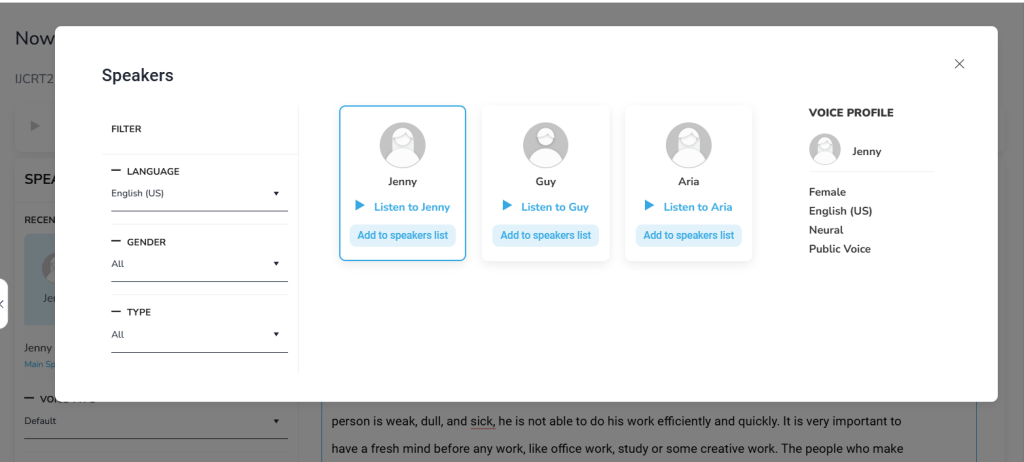
♦Speech Speed: This makes the speed of the narration change either to a slow pace or
a fast pace of narration that you would want.
♦Pitch: Alter the tone to make the voice sound higher pitched or lower, depending on
the desired form of a more dynamic or natural-sounding dispatch.
♦Pause Length: Using real speech data, decide on the length of break to better manage
the human-like feeling of a speech.
♦After setting your settings, click Play at the top of the editor to hear it.
♦It may take time to find the right interweaving.
Step 6: Preview the Voice Settings
♦To hear how your settings sound, click the Play button up in the editor at the top.
♦Make any necessary adjustments until the narration feels just right.
Step 7: Publish the Audiobook
♦After being satisfied with the narration and voice settings, one should scroll down the
editor to the bottom.
♦To complete and generate the audiobook needed, click on the button “Publish
Audiobook.”
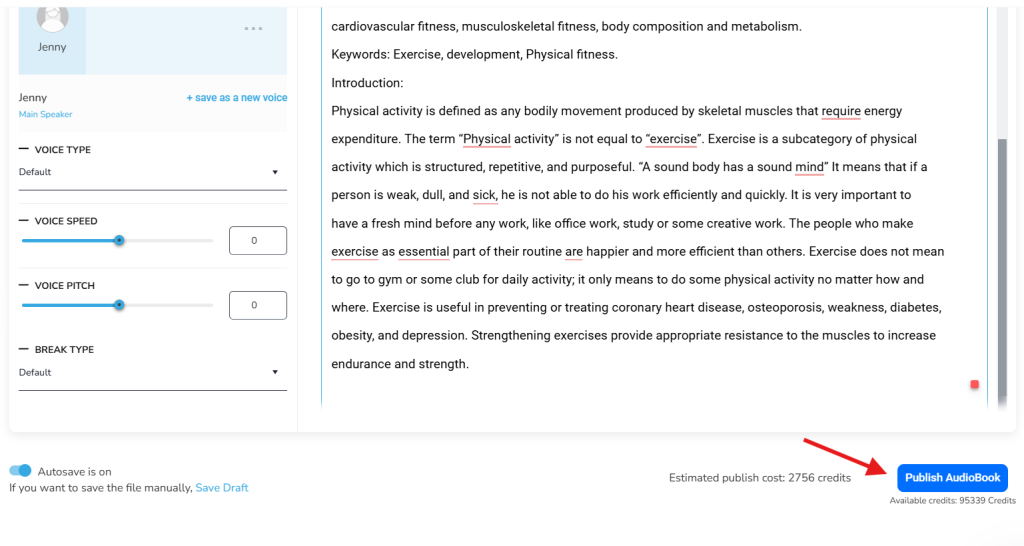
♦The designrr will work in the background to create your audiobook and will send you
an email when it is done.
Step 8: Manage Credits
Even though this may be an option for the heaviest users, most users should be satisfied with
the 100,000 credits included per month.
Step 9: Language Selection
♦Before publishing, if you wish to have your audiobook in a different language, you
can choose as many languages as you desire.
Step 10: Access and store your published audiobooks.
Hear your published works and find a home for them. When done, go back to the Designrr
home page, where all your audiobooks are saved. From here, you can listen, download, and
share your audiobooks.


