Inserting prefilled tables
Free Visme Tutorials/Download PDF and FlipBooks
● On the ‘Editor Window’, select the ‘Data’ tab to access the ‘Tables’ option to edit tables.

● Browse through the blank and pre-filled tables available for various industries like IT,
consulting, marketing, media, and healthcare.
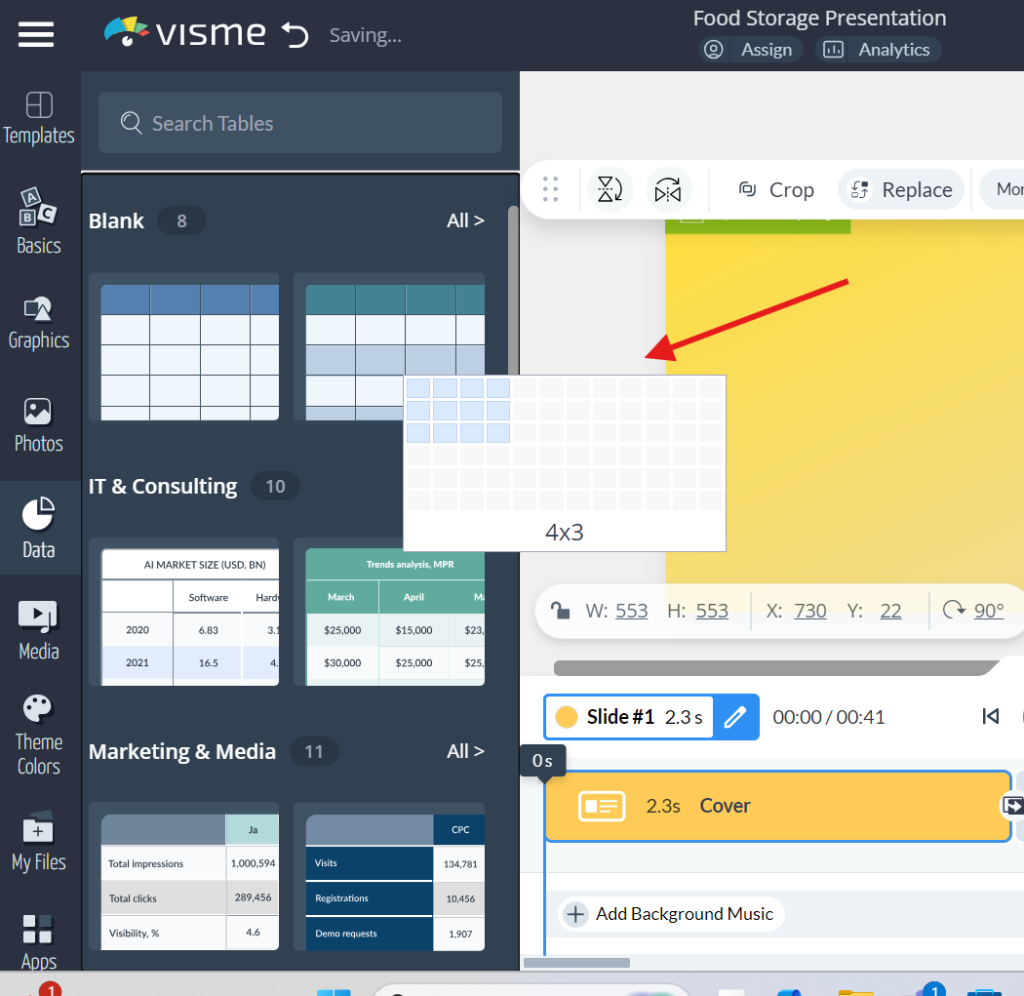
● Once you find the desired table, click on it, and it will be inserted into your project.
Connecting a Table to Live Data
● Select the table added to your project.
● Click the ‘Connect Data’ button from the navigation menu.
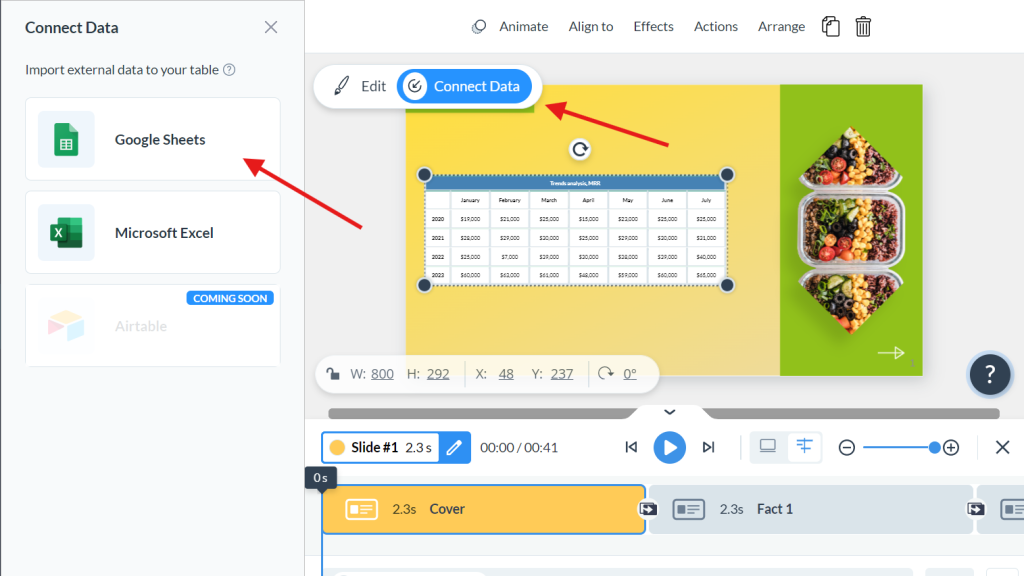
● Select the ‘Google Sheets’ tab.
● Click the ‘Sign in with Google’ option, and you will be taken to the Google
Authentication Page.

● Choose the Google account you want to link and click ‘Continue.’
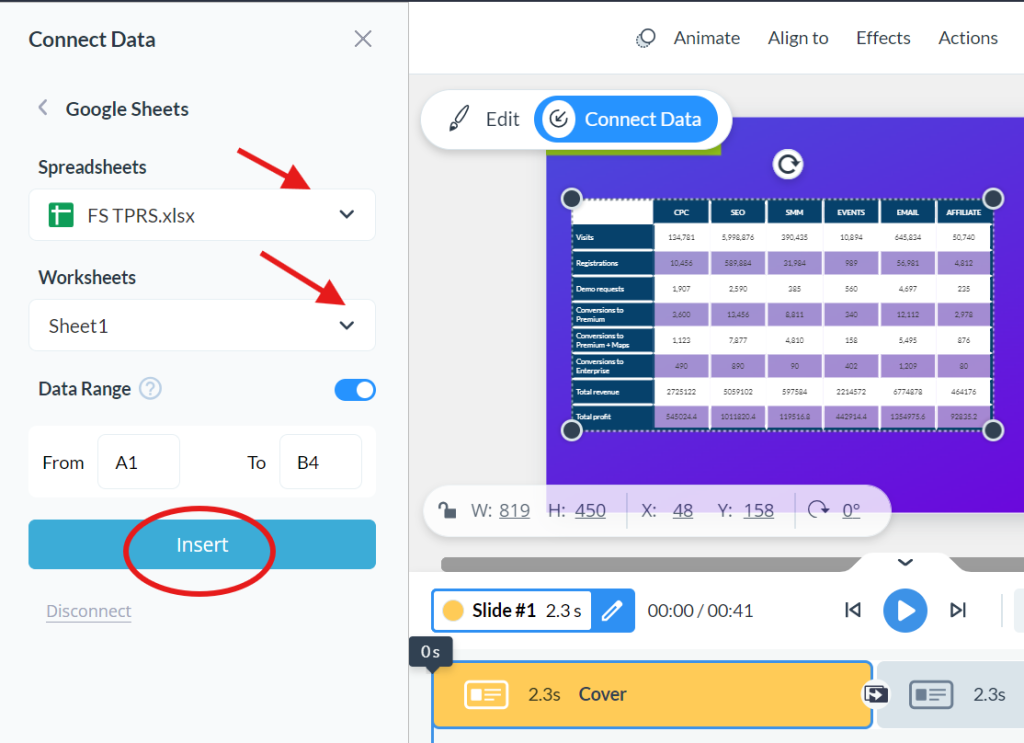
● From the drop-down menus, select the spreadsheet and worksheet from which you
want to import data, then click ‘Connect.’
● Turn the ‘Data Range’ switch on if you want to import a specific range of columns
and cells. Define the range by filling in the boxes below.
Embedding external tables
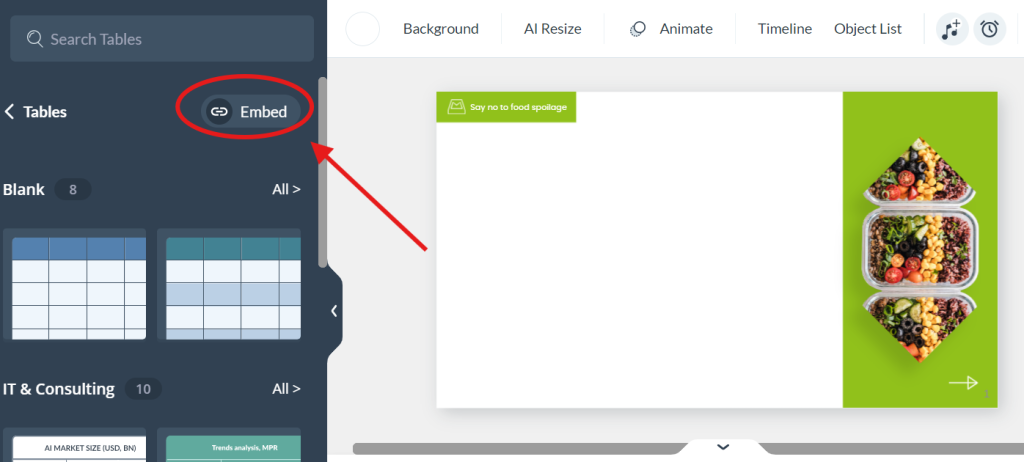
● Click the ‘Data’ tab and go to ‘Tables’.
● Choose ‘Embed’ at the top right of the menu and select where you wish to embed the
table (options such as Google Sheets or Airtable).
● Paste the URL of the document you wish to embed into the provided space.
● The table will be embedded directly into your Visme design.

Merging cells within a table
● Click on the table you need to work on and either right-click on it and select ‘Edit’ or
double-click on it.
● To merge cells, choose them, right-click, and then choose the option ‘Merge
Horizontally’.

● To merge cells vertically, select the cells or columns, right-click, and select ‘Merge
Vertically.’
● To merge all selected cells across multiple rows and columns, right-click and select
‘Merge All.’
*Exit the table editor by clicking anywhere on the page to review your changes.
Adding Content to Tables
● Select the table and click ‘Edit’ or double-click on the table.
* Click on the desired cell to begin typing your data (text, numerical data, or symbols).

● Use the tab key to navigate between cells, but only when the cursor is not active for
typing.
● Exit the table editor by clicking on the canvas to review your changes
● Adding content from an external Google Sheet
● Copy the cells from your external Google Sheet or Excel file.
● Select the cells where you want to paste the data, right-click, and click ‘Paste.’
● Note that pasting external content may alter the table’s formatting.
● Exit the table editor by clicking on the page to review your changes.
Adjusting Table Size
● Click on the table and drag the corner to adjust its size.
● Alternatively, enter the table editor and use the ‘Bubble’ icons to resize the table.

Adjusting Table Fonts and Content
● To change the font for the entire table, select the table and enter the table editor. Use
the toolbar to adjust font, size, style, and alignment.
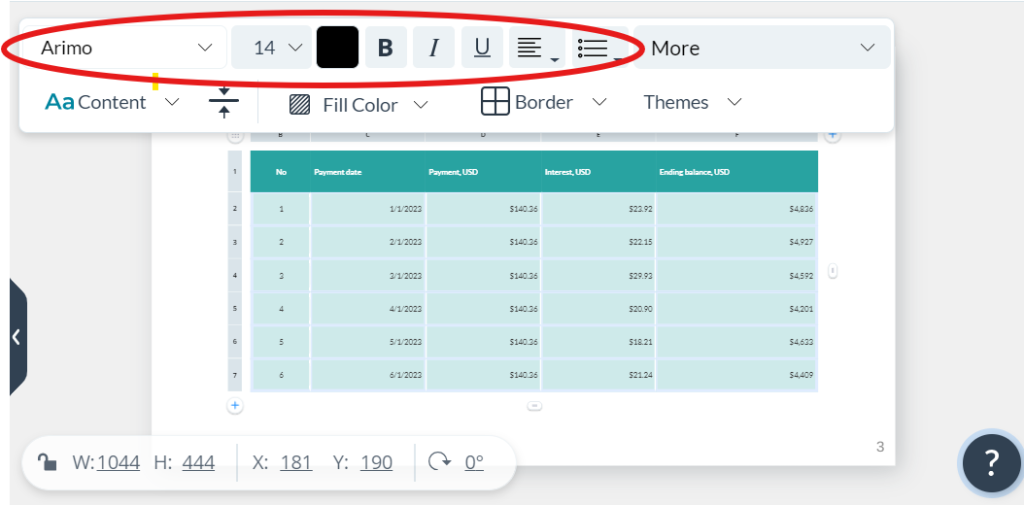
● To change the font and size of individual cells, rows, or columns, click on them and
use the toolbar.
● In the Content drop-down menu of the cell, you can select the type of content as text,
number, currency, percent, or date.
● Use the toolbar to position data within the cell (top, middle, or bottom).


