Using the Timeline
The ‘Timeline’ of Visme can control the animations, transitions, durations, and the order of animated
objects in detail.
Free Visme Tutorials/Download PDF and FlipBooks
* Click the ‘Microphone’ icon on the ‘Animation Timeline’.
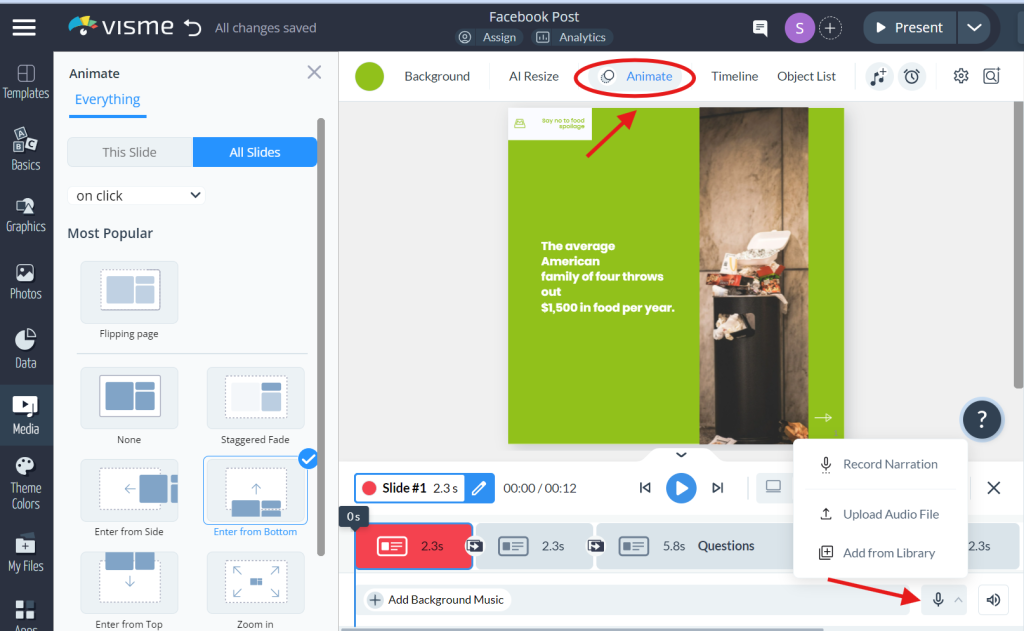
* Use the Audio drop-down list and select the option ‘Upload Audio File’, then browse the
desired audio file and click the button ‘Add Audio’.
*For premium users, MP3 and WAV files up to 25 MB are supported.
* Click the Add from library icon and select an audio track.
* Press the `Record Narration’ button, wait to see the 3-second count on the screen, and start
speaking. Click stop when done, and save your recording from the options given.
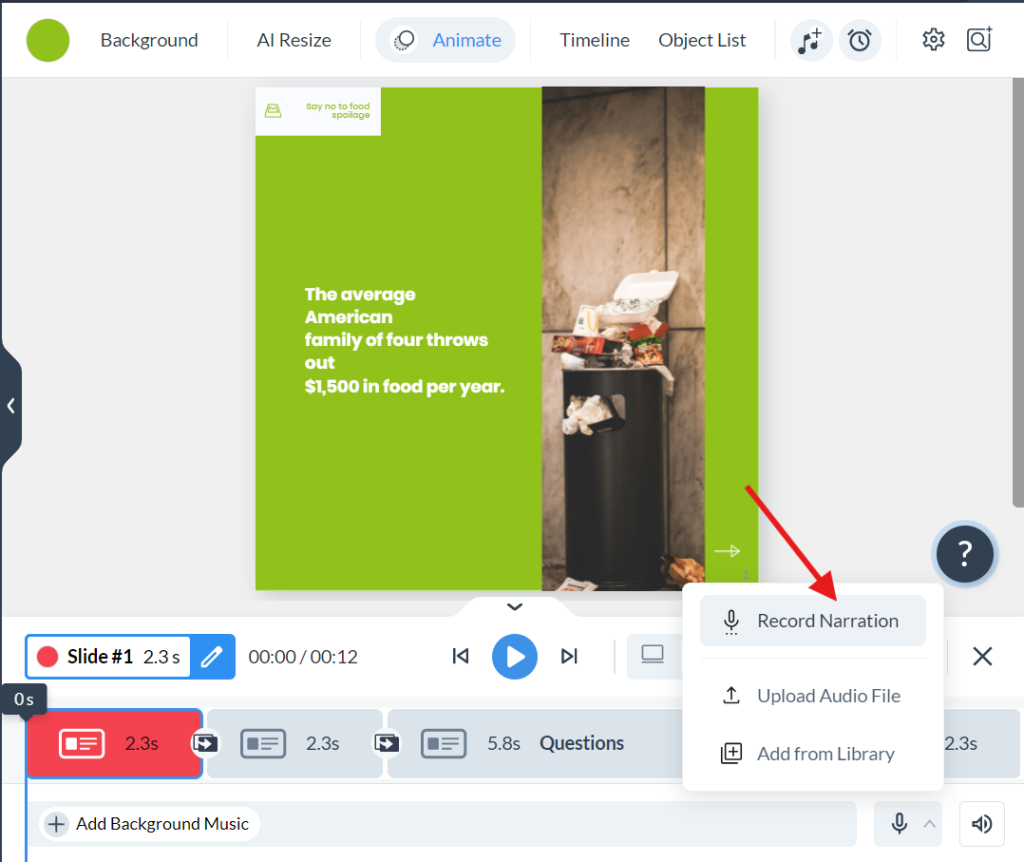
*The audio will be underlined with green color. You are able to cut it or drag it to a suitable
position depending on where you want it to appear on the slide.

Previewing
● Take the blue line and drag it in order to change the position of where the video starts to play.
● To preview the animation, simply click on the play button located at the bottom of the
animation playing field.
● Use the two buttons on the right to go to the start or the end of the animation.
● Pause the playback.

● As for navigation, you can choose the ‘Canvas Zoom’ option and set the values next to it if
you wish to zoom in on the presentation.

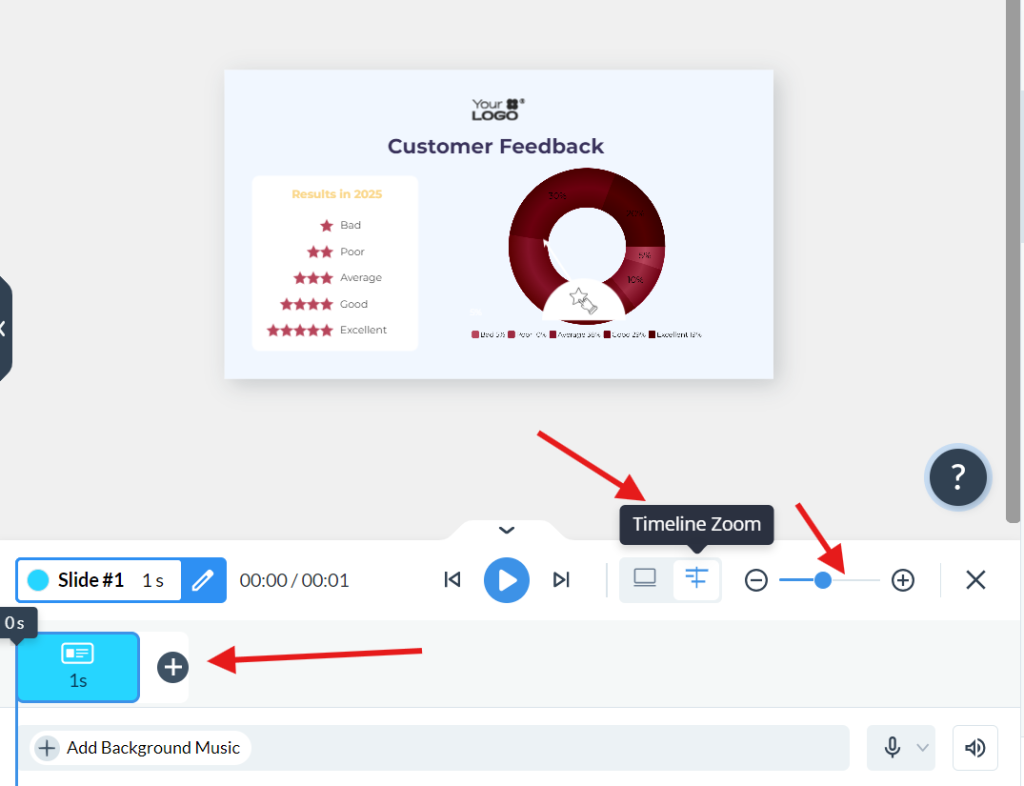
● If you want to zoom the timeline, find the button ‘Timeline Zoom’ and you can adjust the
settings nearby.
How to use an object list?
For every project in Visme, an Object List is indispensable since it allows for managing all the
elements of the design or layers. It lets you arrange items, modify them, and set up actions for each
item, which in general helps improve the design. Here’s a step-by-step guide on how to use this
feature.
Enable the Object List
● Inside the Visme editor, on the top left side of the page, click on the menu button.
* Choose ‘View Settings’ from the drop-down list.
● Now, look for the subheading of ‘Objects List’ and turn it on.
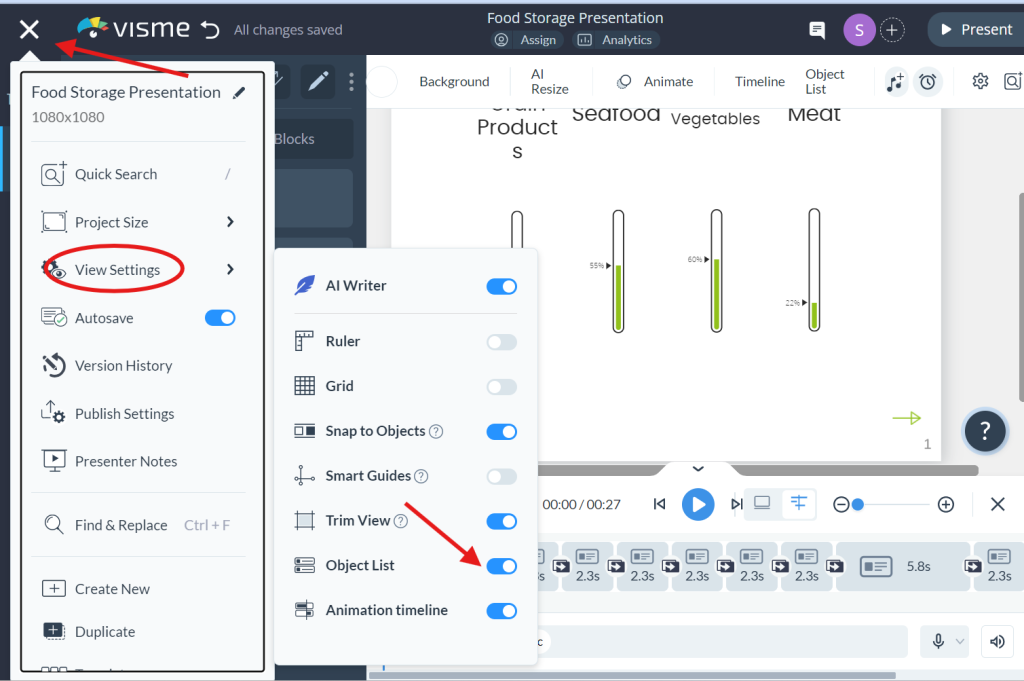
● You can also choose the tab ‘Object List’ on the top of the menu bar on the right side of the
editor page.

Switching Between Views
*In case your project has more than one slide/page, like in the presentations, there are tabs
available at the top of the Object list to switch between ‘My Slides’ and ‘Objects’.
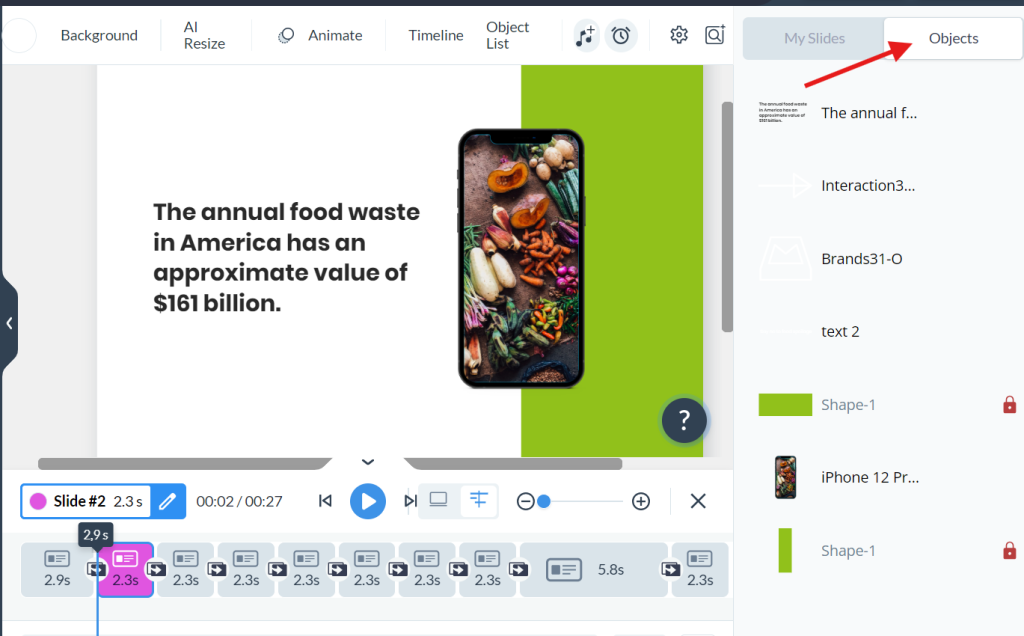
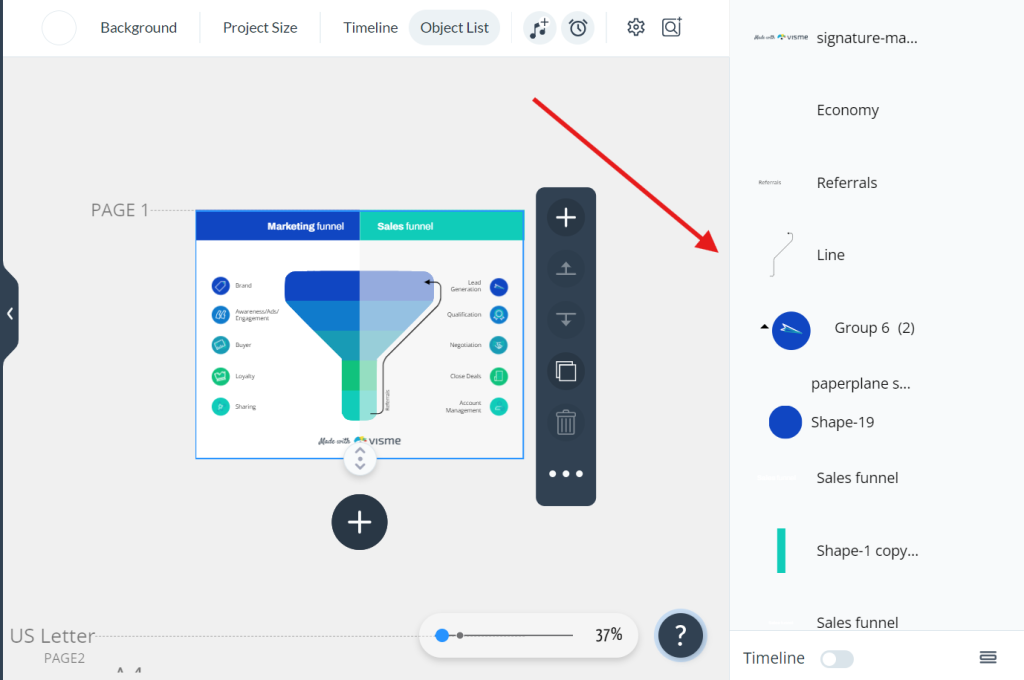
● With regards to blocks used in infographics, the object list loads based on the selected block.
● If objects are grouped, they appear together.
● To the left of the Object List, the icons illustrate the type of the object, whether it is text,
graphic, shape, image, etc.
● Selecting an object on the list will cause it to be selected in the Editor window.
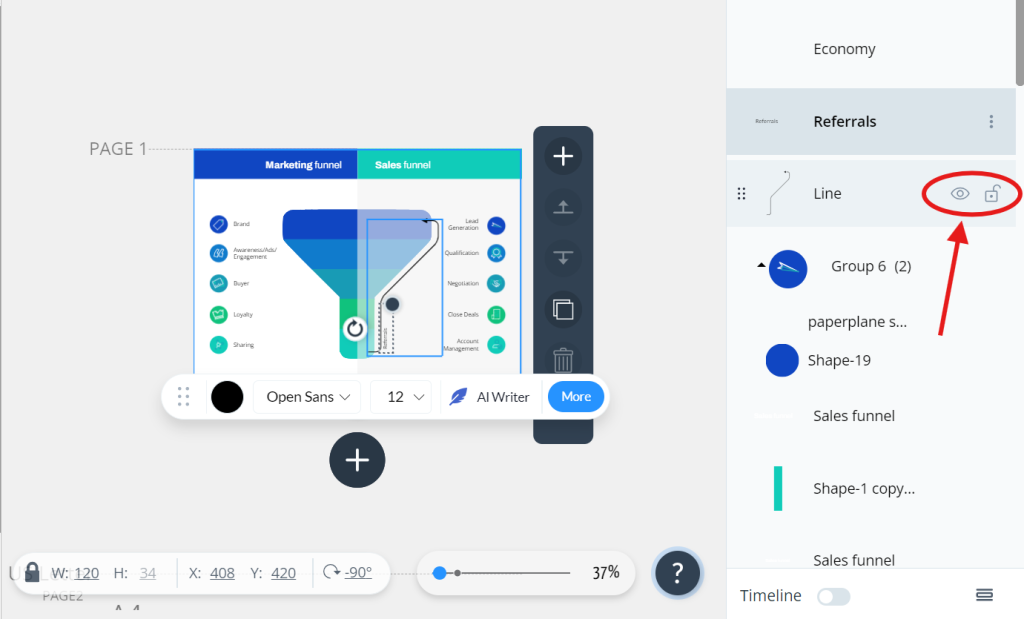
Control of an object’s observability and location
*Click the eye icon located to the right of an object or a group of objects to make that
particular object invisible or visible in the current project.
● A lock icon is to be clicked to avoid moving or changing an object or multiple objects.
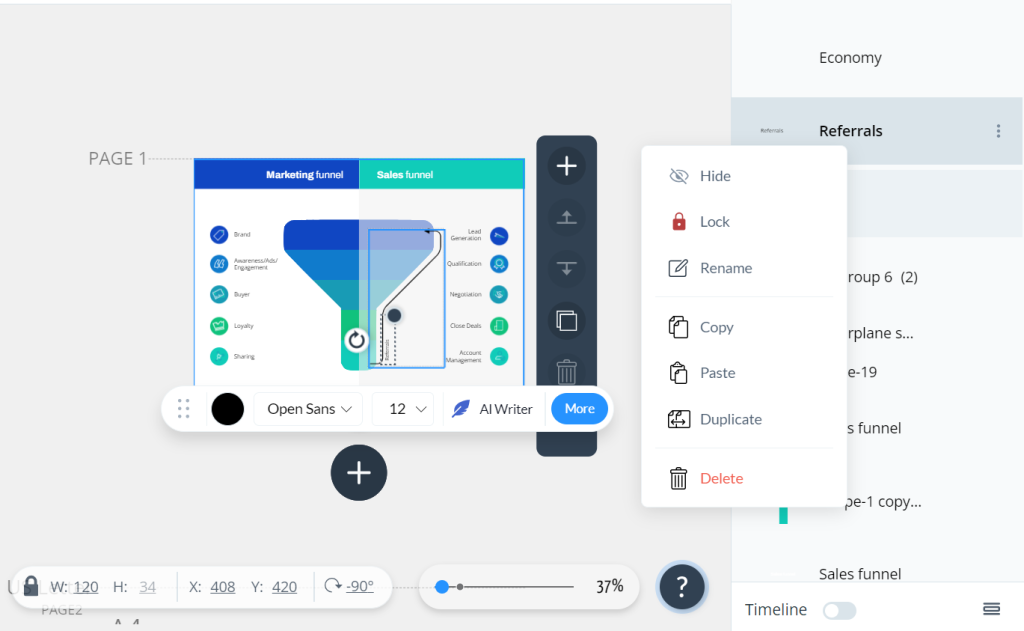
● There can also be a change of the objects’ names to enable better arrangement of items.
● Select the object you would like to rename from the drop-down list. You can right-click and
choose the ‘rename’ option, and double-clicking the object name would also rename it.
How to spell-check?
Visme’s Spell Checker is very beneficial as far as it eliminates possible spelling mistakes in your
project, making your work look polished. Here’s how to use it.
● Click twice on the text box you want to spell check. This will highlight the text.
* Any possible spelling mistakes that have been typed will be highlighted in red.
* Right-click the underlined word for suggestions.
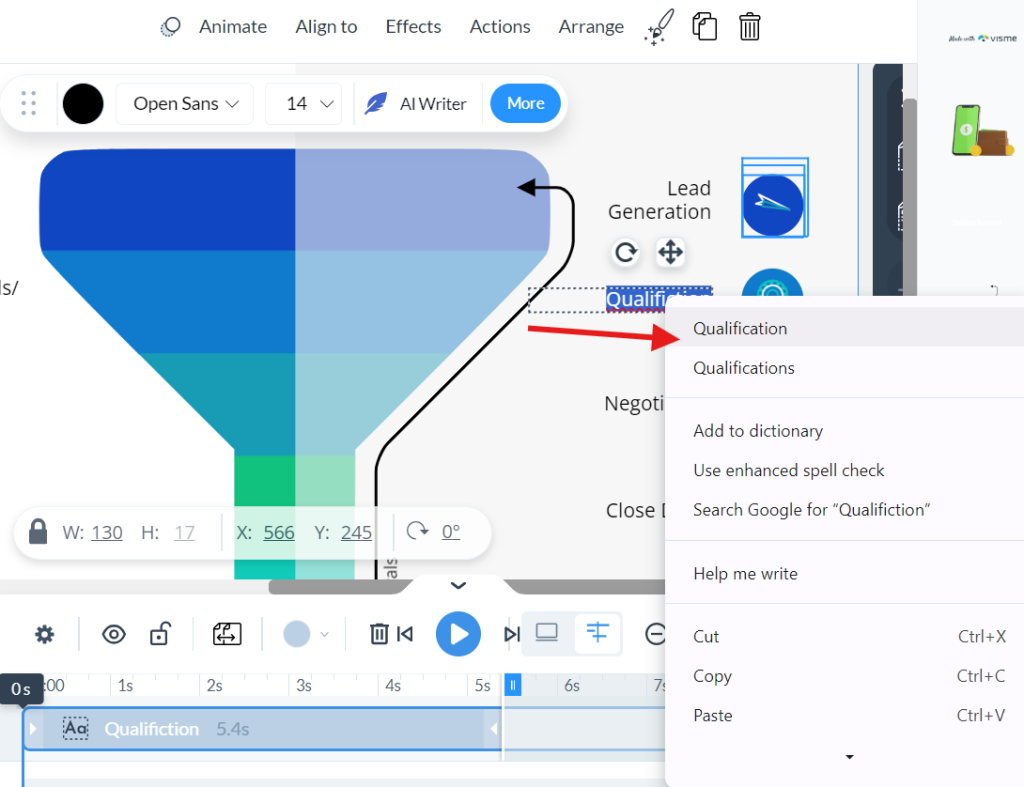
● Click on the correct word from the list to replace the misspelled word.
● If you don’t want the word to be underlined in the future and you wish to retain the spelling as
it is, then click on ‘Add to dictionary’.


