Visme includes ‘AI Resize’ that enables you to resize your project within a short time for the purpose
of different formats. Similarly, to have a presentation, a new document, or to prepare for a social
media post, AI Resize in Visme lets you work quickly and still get high-quality design. Follow these steps to
use AI Resize effectively.
Free Visme Tutorials/Download PDF and FlipBooks
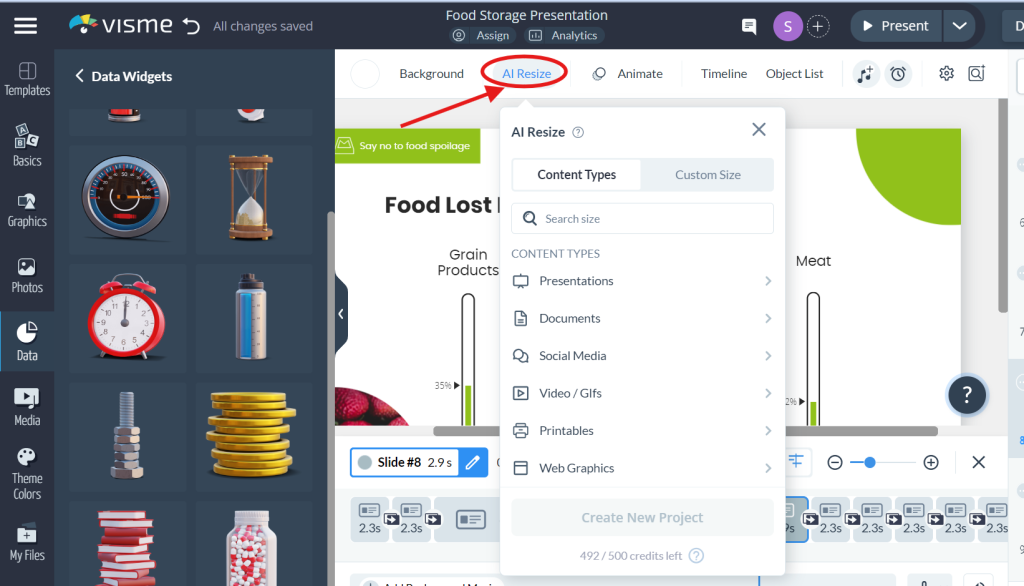
● Go to the Visme editor, and click anywhere on the stage to make sure no objects are selected.
● Select ‘AI Resize’ from the option appearing on the top-left toolbar.

Tip: If there’s no ‘AI Resize’ option, click on the three horizontal lines in the upper left and select
‘project size’. Then, choose ‘AI Resize’.
Choosing Content Types
● In the ‘Content Types’ tab there are the usual suspects such as presentations, documents,
social media, etc.
● Choose the kind of content that you would wish to transform your project into.
Selecting Project Sizes
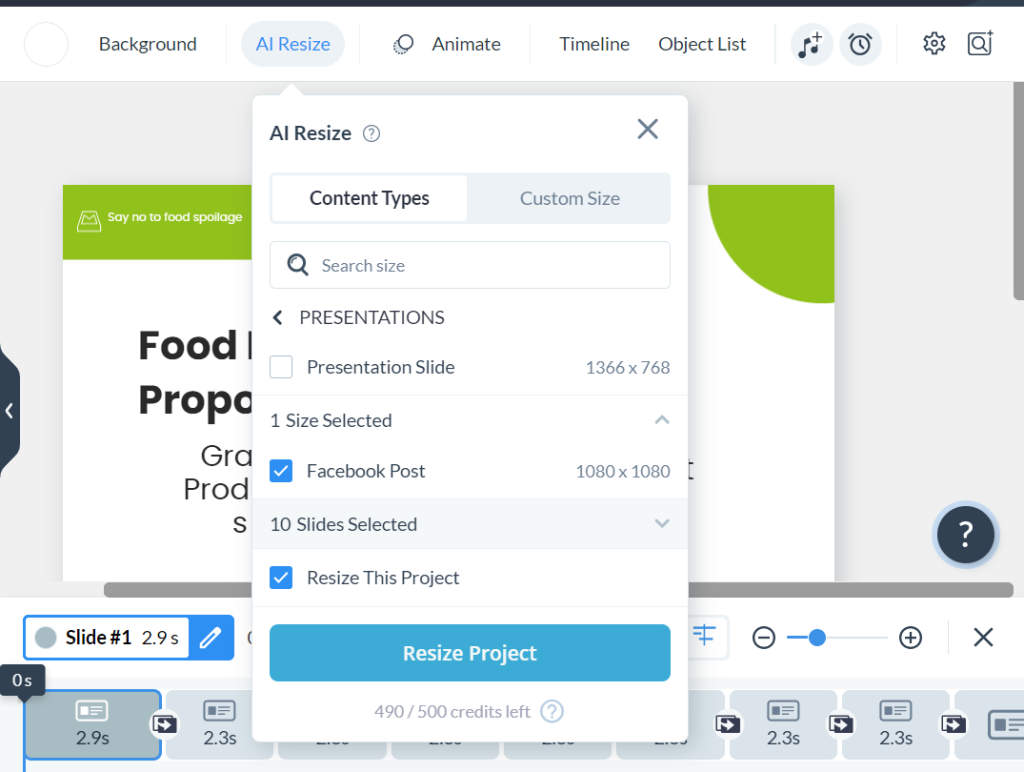
● You can select your desired project size(s) located on the available box on the left side of the
page. Certain content types are available in one size; others are available in multiple options.

● You can choose one or several sizes at once, and that will create new projects in the chosen
sizes.
Selecting Slides/Pages
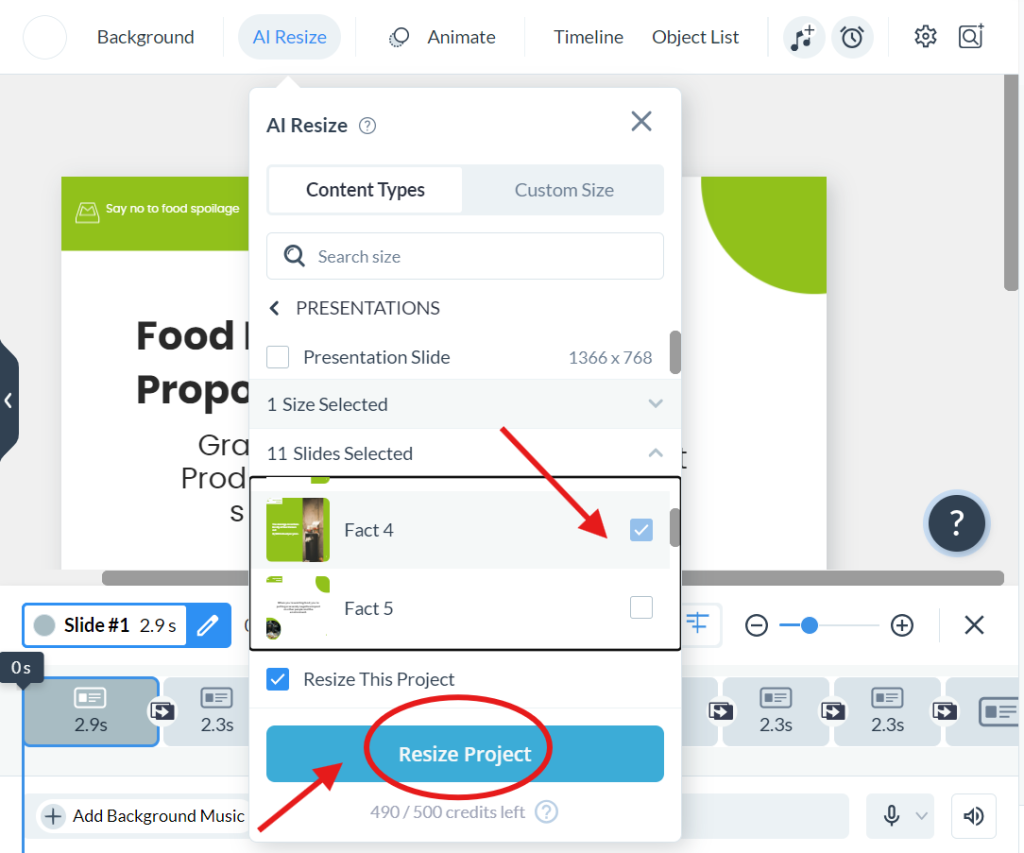
● Click on the arrow icon of the ‘Slide Selected’ menu.
● Use the checkboxes to select the specific slides or pages you want to resize.

● Click the Create New Project button at the bottom to proceed.
Viewing the Resized Design
● Your resized design will open in a new tab.
Note: If it doesn’t appear, try to find out if pop-ups are turned off in the browser, then turn on pop-ups
for Visme.


